Photography in the Clinic #PACPearls
The WDS Practice Advisory Committee (PAC) shares dermatology photography tips including how to take quality photos and save time, before and after photography, dermoscopy and more.
Dermoscopic Photography
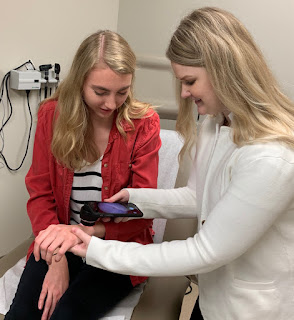
I find it very helpful to monitor pigmented lesions for changes using dermoscopic photography. In order to do this quickly, I have a phone case that is magnetized to hold my dermatoscope in place. Both my dermatoscope and the case are from DermLite. Using an app for EPIC, my photographs can be directly uploaded into the patient's chart for future use. I find this system to be very quick and efficient.
Taking dermoscopic photographs of things that I biopsy has also improved my own knowledge. I review photographs when dermpath comes back to see if there are any features that I can learn from for a particular diagnosis. For anyone who teaches residents, having a library of dermoscopic images can also improve residency training.
- Lori Fiessinger, MD
Obtain Post Procedure Photographs
Baseline photographs before cosmetic procedures can easily be taken when patients come in for treatments, but obtaining post procedure photographs can be more difficult. To encourage patients to come in for photographs after their treatments, try offering follow-up appointments 2 weeks after a cosmetic procedure for possible touch-ups and photographs. This will help to motivate patients to come in at an ideal time for post procedure photographs in addition to improving patient satisfaction.
- Jeanette Black, MD
Photographing Nails
Routinely examine and photograph nails from their surface and free margin views. In this way you will document the source of a nail disorder (nail bed and distal matrix as depicted in this onychopapilloma) and document progress in response to medical or surgical treatment.
- Molly Hinshaw, MD
Create Consistency
If not ready for a more sophisticated photography setup in your practice, consider choosing a white wall in the same space, mark out on the floor a consistent distance and review with your staff the different angles using anatomical features as landmarks to lineup before and after photos.
The American Society for Dermatologic Surgery (ASDS) has a poster on photographic standards that can be put up on the wall in the photography-designated room. This can help to remind staff of face and body positioning to get greater consistency with photos (poster can be purchased online through the ASDS).
- Monica Li, MD
Not all practices have the resources and space for a sophisticated photography room. You can incorporate inexpensive techniques for photography standardization such as using black or white backdrops made of thick cardboard cut into desired sizes. These can be kept in each patient room, easily accessed and placed behind the patient to efficiently capture photos without having to move the patient. You can also place these behind the doors in patient exam rooms, again for easy access.
- Mona Sadeghpour, MD
Good before and after photos are hard to do- one must reproduce the exact lighting and position of the patient. Using the same room and buying a few lights inexpensive on amazon such as this with a dedicated space is best.
- Margo Weishar, MD
Useful Apps
Use a program that allows “ghosting.” Overlaying the new photo with the old photo can really improve your accuracy. We use RxPhoto which is a paid program but there are free apps to try as well. iPhone 10 photos are very high quality for everyday use. For publishable quality, you will probably need a higher end camera.
- Margo Weishar, MD
In trying to keep follow-up photos uniform, I would look into an app called Imagine (NFI).
- Mark Kaufmann, MD
*Please note, all products and apps mentioned are included as examples and are not endorsed by WDS.


Comments
Post a Comment